

How To Add Two Columns below your blogger post

1. Log in to your dashboard--> layout- -> Edit HTML
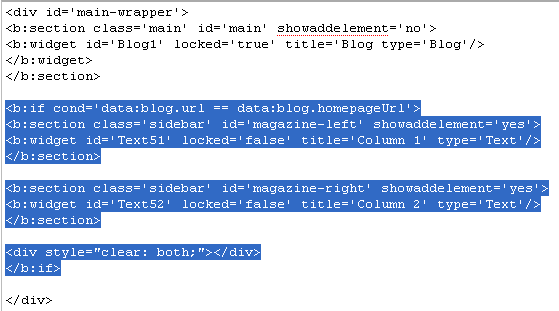
2. Scroll down to where you see like this code.
<b:section class='main' id='main' showaddelement='no'> <b:widget id='Blog1' locked='true' title='Blog type='Blog'/> </b:widget> </b:section></div> |
3. Now add below code between </b:section> and </div> .
<b:section class='sidebar' id='magazine-left' showaddelement='yes'> <b:widget id='Text51' locked='false' title='Column 1' type='Text'/> </b:section>
<b:section class='sidebar' id='magazine-right' showaddelement='yes'>
<b:widget id='Text52' locked='false' title='Column 2' type='Text'/> </b:section>
<div style="clear: both;"></div>
|
Look at the picture below.

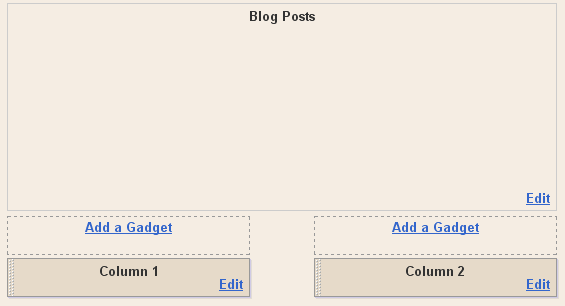
Now it will look like this.
4.Now Find below code.
5.Add below code before ]]></b:skin> tag.
width: 45%; float: left; } #magazine-right { width: 45%; float: right; } |
6.Now save your template and you are done.It look like this.


No comments:
Post a Comment